HO Trains are among toys, which are considered too expensive for children to play with. It may also be considered that an HO model railway layout is too complicated for children under age 7-10 years old. this is partially true.
Although, we have found that an adult’s assistance allows children from the age of 5-6 to play with it without any difficulties. Moreover, we can use it as a great tool for teaching; improving fine motors skills and developing cooperative playing. In this article, we will share our experience of building HO train table for educative play with children. The result is presented in the video below:
About history
When I was a child my father bought a PIKO train set. My friends and I had a lot of fun playing with that PIKO set. In the picture below I am playing with the vintage PIKO train set with my son 12 years ago.

Unbelievably, this train set, after more than 35 years, is still going strong!
It was difficult to construct a railway on the floor and then have to deconstruct if all after the game. Track laying took about 30-40 minutes, consequently I and my son were already tired before we started to play with the set. In the process of the game the tracks continuously came apart, and the locomotive lost its power due to abrupt loss of electricity supply and was also constantly being derailed. Additionally, spending a long time on all fours was not very comfortable… At that time I thought, “We need a table to play on”.
11 years later, for my other son, I built my first HO railway table. Before we played, we set up this simple table, a 2000 x 1220 mm (79×48 in) piece of plywood on four stools (see the picture below).
This game with the train on the table did not become boring for my son as I thought it might. Moreover, after a short time, my son and I found that it was not enough for us. We had only one side track, which was rapidly filled with cars. The project did not have an engine house and the turning table existed just for fun. Space in the middle of the table was difficult for my son to reach, for this reason this area almost always remained empty.
We concluded that our future project should include:
- Closed route
- Yard
- Long side track (at least one)
- Engine house
- Container terminal
- Construction sites
- Manual and automatic turnouts
- Railway signals
Size of HO railway table
At first, we should decide the size of the project. A good HO train layout is never big enough, this is your motto. In our case, the living room allows us comfortably fit a table up to ~3m x 1,5m. With this size we can easily walk around the table.
Last time there was a dead space in the middle of the table, therefore the width should be less than 1220 mm (48 in). There are two main radiuses of HO curve tracks: 18” and 22”. A simple circle from 22” tracks could be fitted on a table 1120 x 1120 mm but that is too large for our requirements. If we use 18” curve tracks, the minimum width the table needs to be 910 mm (~36 in). The 18” curve tracks are acceptable for our table’s size. Remember, 18” radius’ tracks are appropriate for using up to 4-axel locomotives, but it could be a problem to use 6-axel locomotives. At the end we knew the preliminary size of the table: ~ 3 x 1m.
Model railroad design software
Meet SCARM [1], great and absolutely free software for railroad design! Intuitive and easy SCARM converts the railway layout design to an art! I enjoyed spending hours creating the project in SCARM.
In our first drafts there was a figure of eight shape track with a crossing in the middle (see the picture below). I found out from a forum [2] that we need to isolate the ends of the “figure eight” and use a polarity reversing switch.
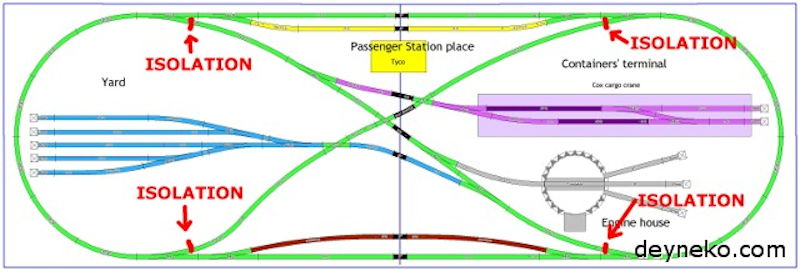
The isolation will prevent short circuits. This project was rejected to avoid being over complicated.
Final draft and zones for construction
Below, in the picture is our final draft. The project includes all we planned above.
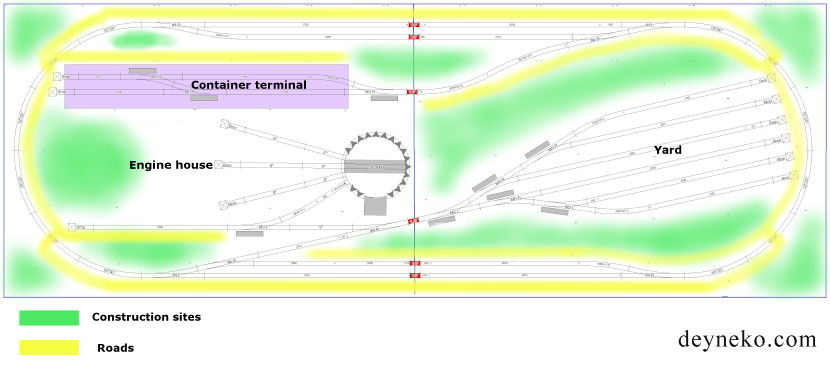
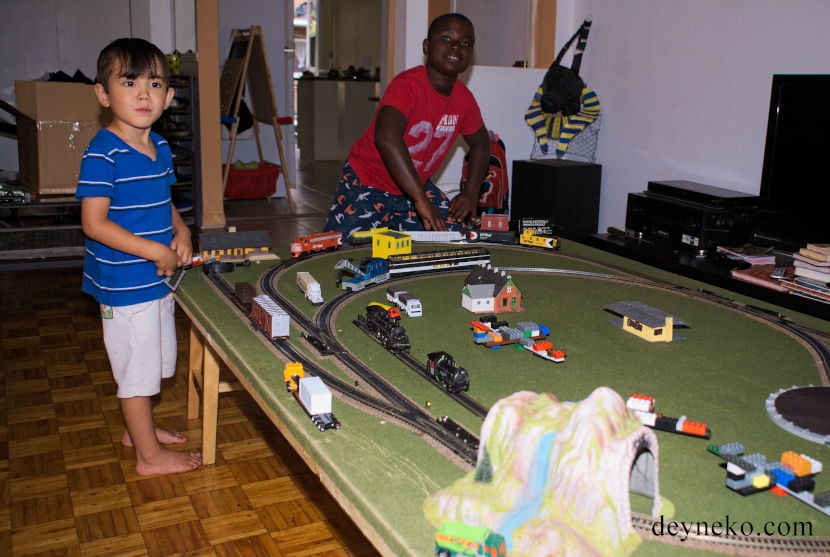
The last time we played, we found that an HO train layout and Lego or Mega blocks, or similar, was a great combination. “Construction zones” should be left preferably close to the periphery. In the picture above such zones are marked green.
The project includes 16 turnouts (7 – automatic and 9 – manual). We will talk about them later.
Building a table
After creating the project in SCARM we knew the exact size of the table we wanted to use – 1 x 3 m. I decided to construct a folding table with 2 sections 1.5 x 1 m. When the table is folded, wires and under table switch machines are inside and therefore protected.

It is easy to understand the construction of the legs from the picture below. Additionally, in our video, at the beginning of this article, you can see the process of the table.
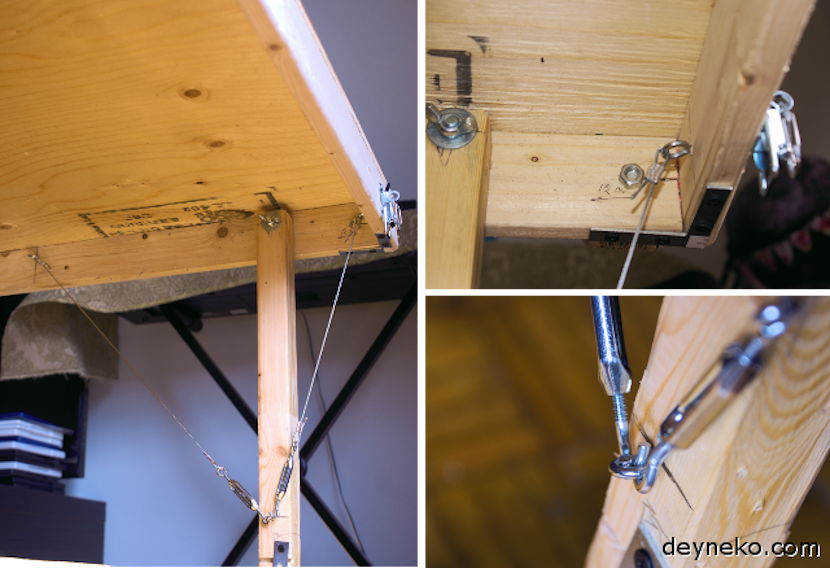
It was expected that the construction would be heavy, so to moving it easily we installed 4 rollers (watch the video).

On the other side of the table we put handles to move it more comfortably.
Covering the table and placing railway tracks
We used a “ReadyGrass” vinyl mat for covering the wood of the table. The mat was fixed to the table’s sides with staples.
The SCARM software allows you to print whole layout in 1:1 scale. After printing, we placed sheets on the table and connected them with pieces of tape.
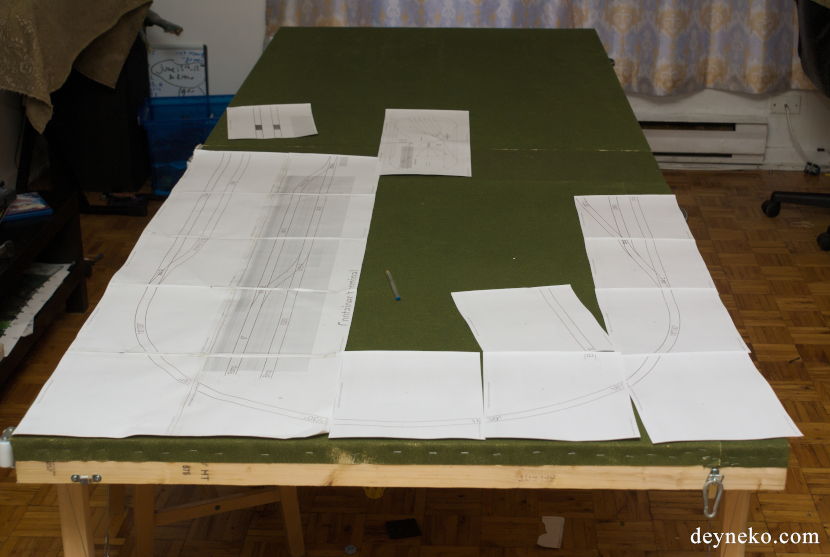
The tracks were placed on the printed sheets according to the printed drawing. Then the tracks were tacked right through the printed sheets. The railway tracks between two sections were connected with 1.5” straight snap-tracks. The “connecting tracks” can be seen on the picture of our final draft (above), they are red. Those 6 tracks were not fixed to the table. Between the 1.5” straight snap-tracks and the main tracks on both sides there should be a space of about 0.5-1 mm.
After all the tracks were positioned, the printed sheets were removed by tearing carefully. Then, the cork roadbed was slid under the tracks and fixed with PVA.

Then the tracks and the roadbed were finally fixed to the table with nails.
Wiring of an HO train table
You can find much material about DC or DCC wiring in the internet. Here I will write only about some details of our project.
DC vs DCC
We choose DC control system. Why? You can read about it HERE (not ready yet).
Control panel
In this project I built a control panel that is connected to all the automatic switches. Moreover, the control panel includes a switcher for a turning table (in the center) and a switcher for activating or deactivating a locomotive depot’s tracks.
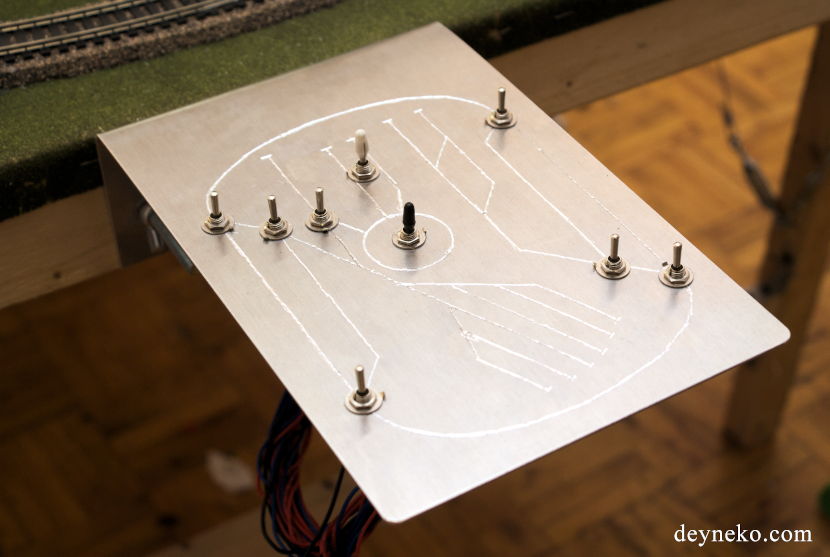
The control panel was made from a 2 mm aluminum plate. We engraved a scheme of our layout on it and made holes for switchers. When the table is folded, we remove the control panel and keep it inside the table.
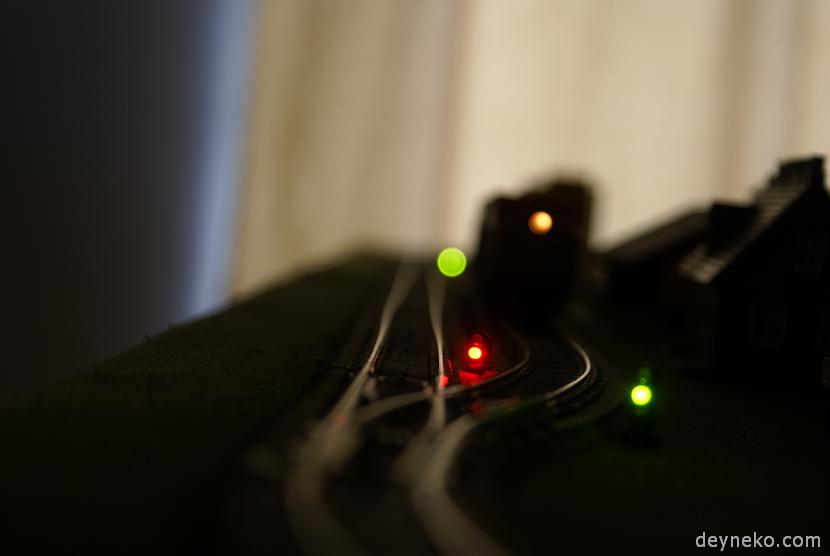
Signals and lights
Signals were connected to all the automatic switches, they are controlled by under table switch machines with relays. We made very simple and tough signals by ourselves (LEDs + epoxy + resistor).
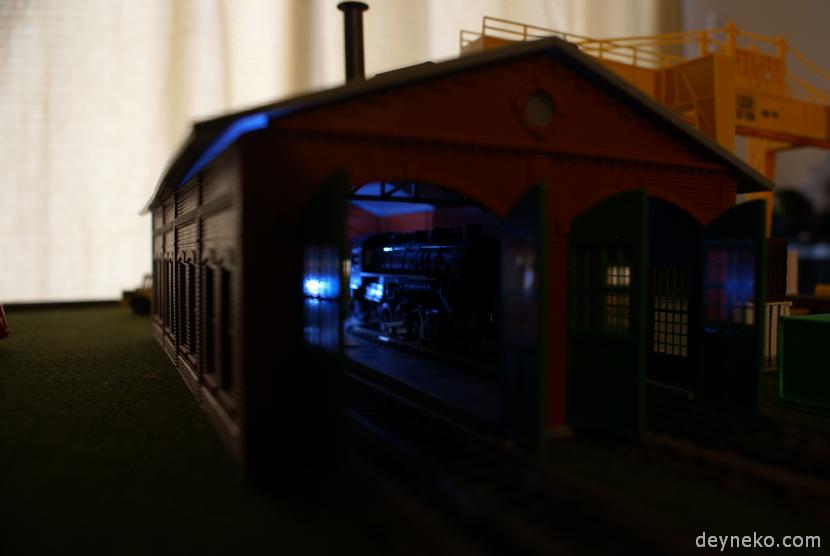
The layout has only one light in the engine house, but we plan to put more lights in it.
What I would change in the project if I built it from scratch again.
The table has 5 cm from the roadbed to the edges (on the long sides). It is not enough. It would be better if the distance from the roadbed to the edge of the table was at least 7-8 cm.
Finally, I would say that I completed our main goals with this project and my son enjoys playing with this model railway layout.
Thanks:
To DonR, CTValleyRR, RT_Coker from Modeltrainforum[2], for their suggestions.
To Mr Milen Peev, the author of SCARM.